
Rational approach to sufficient depuration
with minimal set of periodontal instruments
Treatment case by RDH Tatiana Brandt
Introduction
Case for rational approach to sufficient depuration with a minimal set of periodontal instruments
Efficacy of nonsurgical periodontal instrumentation depends on many factors, including gingival inflammation, root anatomy and pain management. However, clinicians’ experience, skills and understanding of periodontal pocket anatomy and defect morphology play a crucial role in the success of subgingival instrumentation. Detailed knowledge of instrument design might also affect technique.
The choice of periodontal instruments for debridement and scaling depends on the location, hardness and composition of tartar, the consistency of adjacent soft tissues, and the topography of the periodontal pocket. Still, it is possible to increase instrument efficiency by selecting appropriate instruments and scaling techniques or better adaptation and movement of instruments.
My choice of hand instrument set will illustrate a professional approach to a time-effective and rational use of only a few periodontal instruments. The suggestion of instrument set aims to meet individual clinicians’ needs and preferences, and in addition to this, is designed to adjust the choice of instruments to reflect the extent and severity of patients’ diseases.
Working with step-by-step illustration of specific set of instruments will help clinicians to systematize the approach to periodontal instrumentation, give suggestions on how to be more creative in instrument choice and application, make instrument use more beneficial for root sites with concavities, grooves and depressions, and be less time-consuming. Besides, novice clinicians often find it helpful to review a simple instrumentation guide. It is advisable to perform sub-gingival periodontal hand instrumentation in combination with powered ultrasonic instrumentation, considering that instrument condition and sharpness are critical in providing successful periodontal treatment.
My desire is to show, through step-by-step clinical cases, how various instruments are used in practice to produce outstanding treatment results. This periodontal set illustrates treatment case with short explanatory texts alongside the images. I have selected the periodontal set based on size and location of tartar deposits, root topography, and an individual clinician’s preferences together with an idea of a rational approach, without compromising quality.
The choice is still the clinician’s choice. There are many excellent options and other plans for tartar removal that can be developed by experienced dental professionals.
Treatment case
Rational approach to sufficient depuration with minimal set of periodontal instruments: Effective instrumentation with Gracey curettes
Text and clinical pictures by RDH Tatiana Brandt, clinical lecturer at School of Oral Health Care, University of Copenhagen
Effective periodontal instrumentation may be achieved by using just a few instruments, provided that the correct
instrumentation technique is applied. There are many combinations of technical depuration solutions with a minimal number of hand instruments, but the clinician’s preferences are the most important factors in choosing the optimal set of instruments. The set presented in this approach is for dental professionals who are familiar with using Gracey curettes. The most valuable features of the instruments can be realized by combining delicate Mini versions and longer Macro versions, but at the same time the number of instruments used on one patient will be reduced as far as possible.
Video
Above you find the treatment case presented on this page as full step-by-step demonstrational video.
PDF document
You can also download the full illustrated case as PDF document.
Clinical characteristics
When planning to remove tartar, some questions need to be answered: What anatomical characteristics present a challenge for this patient? What type and thickness of tartar has been detected? What type of gingival phenotype does the patient have: thin or thick? Which of the periodontal instruments should you select for removing tartar from the back and front teeth?
The present case demonstrates an instrumental approach to patients with the following clinical characteristics:
- need for more comprehensive periodontal treatment
- probing depth predominantly ≥ 5 mm
- medium tartar deposits above and below the gingival margin
- small deposits on middle or apical third of root
- different topography of pockets with combination of wide and narrow periodontal pockets
- possible thin gingival phenotype
This case does not take account of periodontal diagnostics.
The gingiva has been removed from the typodont in this case images, to provide a view of the working-end of the instruments.
Choice of instruments
My choice for this severity level is a set of Gracey finishing curettes and a sickle.
- Mini Gracey 11/12 with miniature working ends for scaling of mesial sides, mesial root segment of furcation areas and root concavities
- Macro Gracey 13/14 where a more rigid working end is used for scaling of moderate and tenacious deposits on distal sides with wider defects and horizontal stroke technique palatally and lingually
- Mini Gracey 1/2 for front teeth and distal root segment of furcations
- Mini Sickle for fracturing, finishing and detecting strokes
Figure 1 Instruments made with LM-DuraGradeMAX™ super steel: Mini Gracey 11/12 211-212MES, Macro Gracey 13/14 213-214AFES, Mini Gracey 1/2 201-202MES and Mini Sickle 311-312ES.
Related products
All instruments chosen in this set are made of uncoated LM-DuraGradeMAX™ super steel, which can be re-sharpened by the user. Note that the delicate working blades of Mini Gracey 1/2, Mini Gracey 11/12 and Mini Sickle might be difficult to sharpen. In such cases, the LM Sharp Diamond™ instruments, with their sharpen-free coating, may be a good option and solution for the clinician.
As the effectiveness of instrumentation decreases as probing depth increases, especially when probing depths exceed 5 mm, scaling of this type of dentition requires area-specific instruments with longer extended shank lengths. Extended-shank curettes such as Mini and Macro Gracey curettes are modifications of the standard Gracey curette designs. The terminal shank is 3 mm longer and allows extension into deeper periodontal pockets of 5 mm or more, as demonstrated in this presented case.
The traditional, universal curette design is not the best choice for narrow, deep periodontal pockets. Correct adaptation and activation of standard universal instruments are challenging due to the shorter shank length and a long working end. Mini blades that are half the length of the standard Gracey curettes allow easier insertion and adaptation in deep, narrow pockets, furcation areas, concavities, depressions and deep and tight facial, lingual or palatal pockets.
Note that Gracey curettes, despite being designed for subgingival scaling, are also used supragingivally in this case. They can be perfectly adapted to the curved palatal and lingual surfaces found in cases of gingival recession.
Once the instruments are defined, we must choose the most appropriate way to scale.
.
Effective instrumentation with Gracey curettes
It is preferable to start removing medium-size tartar deposits above and below the gingival margin with powered
ultrasonic instruments, choosing a tip designed to be more active at moderate power settings, followed by manual hand instrumentation. It is easier and more time-saving to remove medium-sized tartar deposits located above the gingival margin using an ultrasonic device.
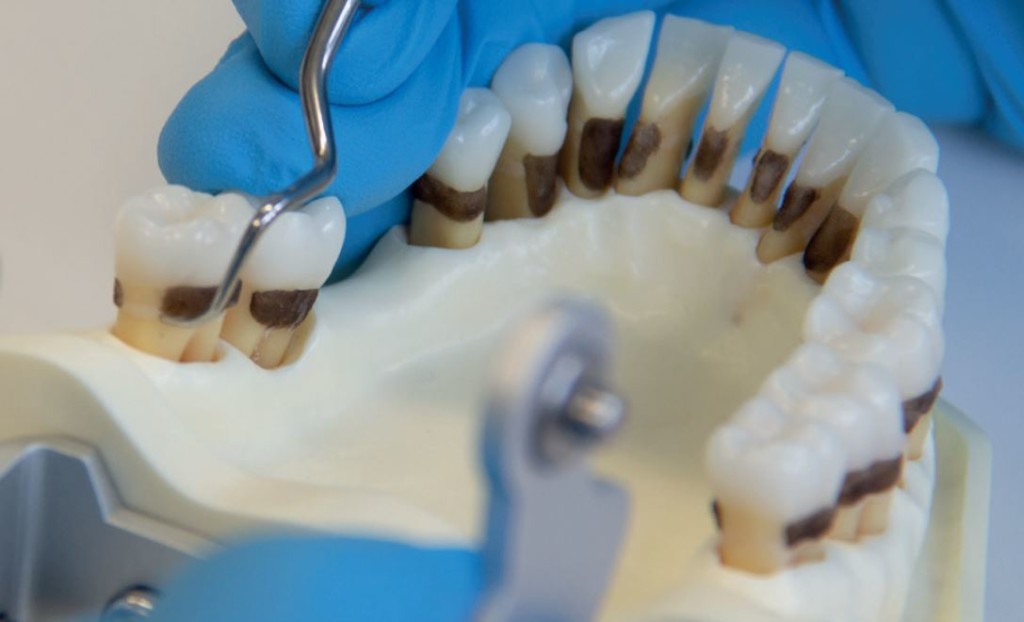
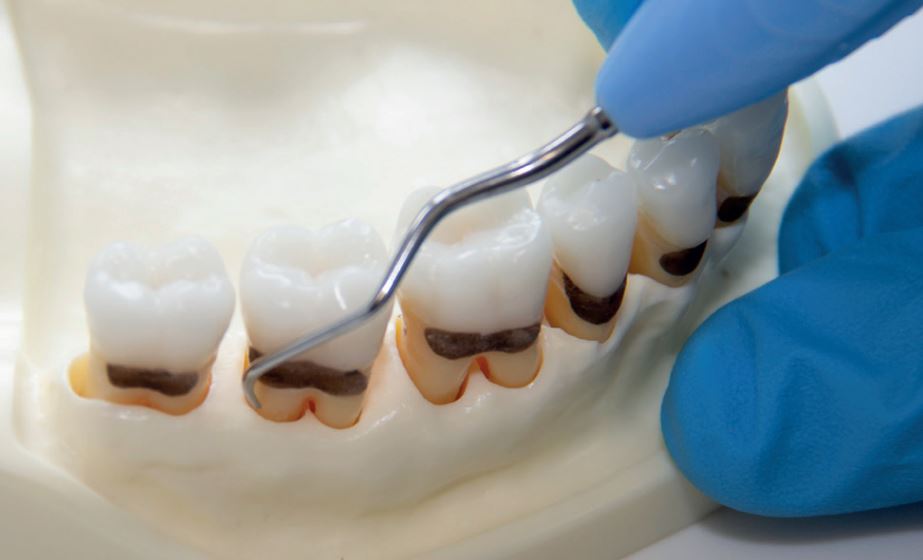
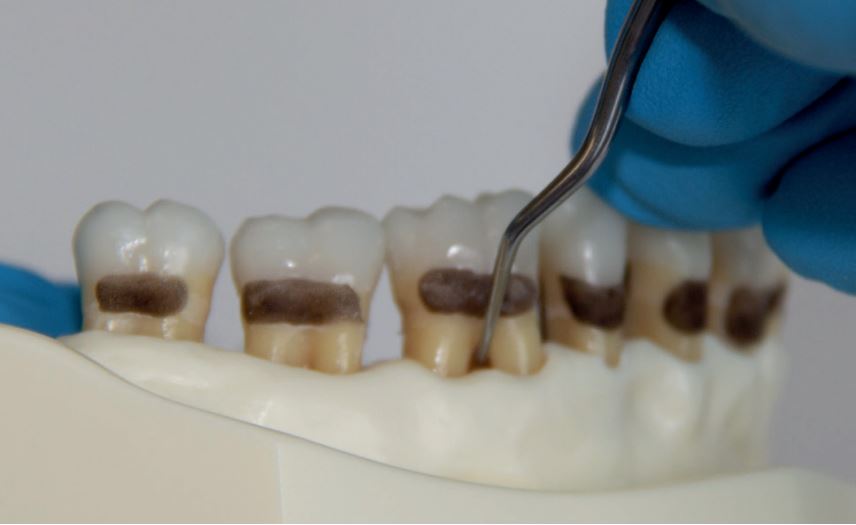
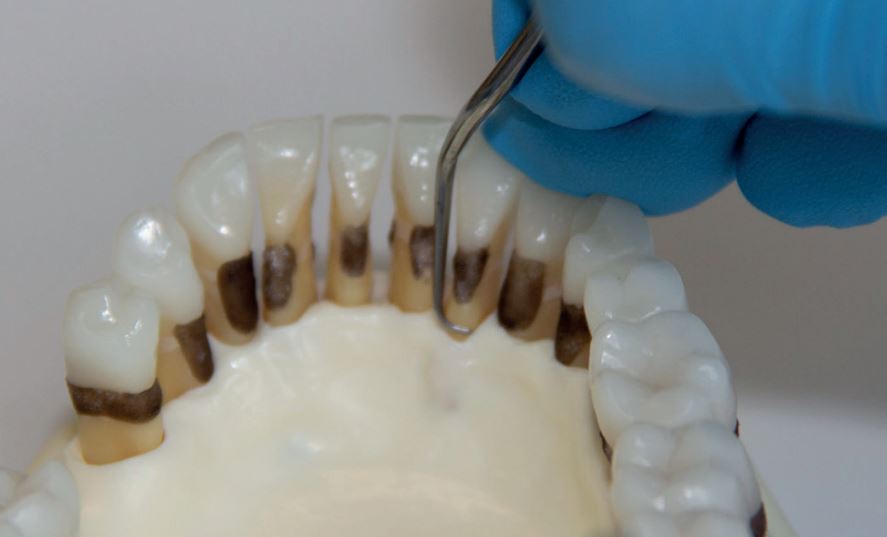
Figure 2 illustrates how Mini Sickle is being used for tartar fracturing as an initial coarse scaling process. It is important to complete instrumentation once coarse scaling starts. Clinicians must decide how many quadrants need to be completed at one appointment and avoid coarse scaling alone because of risk of difficult instrumentation caused by tight gingiva at the next appointment and reduced patient motivation.
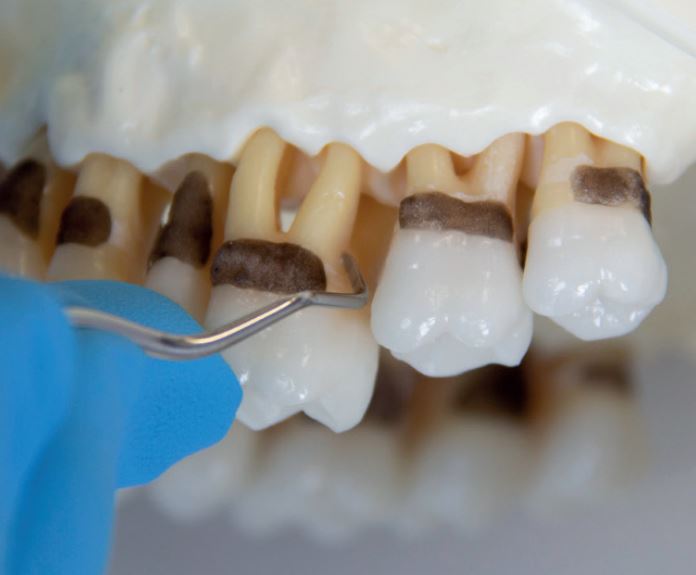
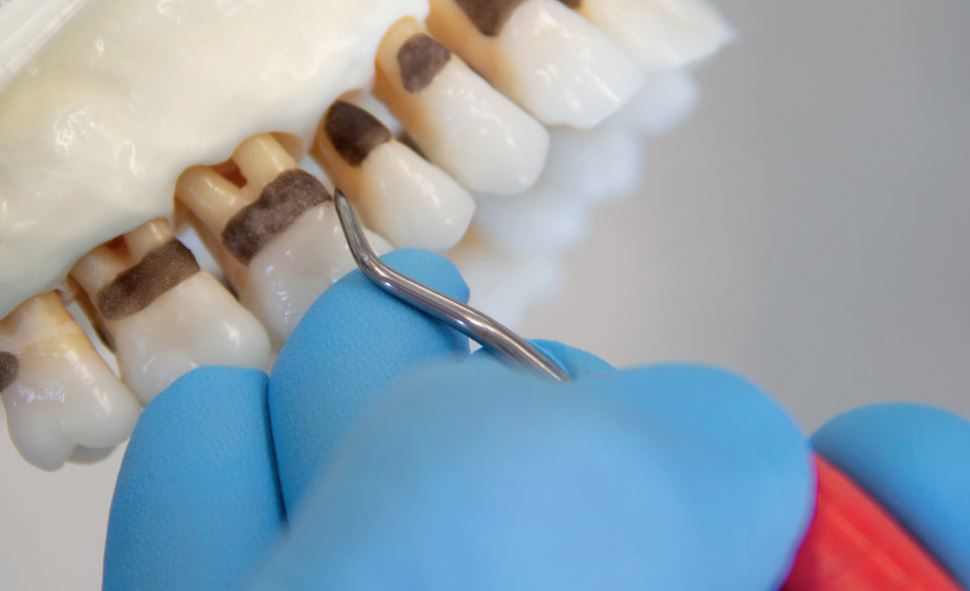
Figures 3a, 3b Scaling posterior distal surfaces with the Macro Gracey 13/14 Sickle scalers with fine, slightly angled blades are very good and time-saving for scaling medium size deposits just under the gingival margin. Note that only the extreme third of this sickle scaler needs to be adapted to the tooth surface to be effective and help with debridement. Correct adaptation and angulation at 80 degrees are especially important under the gingival margin and in tight proximal spaces.
If the tartar is not tenacious, the clinician can choose to skip a Mini Sickle and start instrumentation by performing a series of vertical overlapping strokes across the distal surfaces, using Macro Gracey 13/14 with a lower shank adopted parallel to the distal surfaces. Start the periodontal instrumentation from the distofacial line angle to the midline of the distal surface. Continue making a series of short, precise strokes across the distal surface. Extended shank instruments, such as Macro Gracey 13/14, are indicated for deep and wide periodontal pocket depths greater than 5 mm. The lower shank of a Macro Gracey is 3 mm longer than that of a standard Gracey, and the long working blade easily accesses the middle parts of wide distal surfaces with vertical strokes. It is advisable to use an extraoral fulcrum for better angulation and access to the bottom of periodontal pockets as shown (Figures 3a, 3b).
Figures 3a, 3b Scaling posterior distal surfaces with the Macro Gracey 13/14
The clinician can flip the instrument over and move on with the same instrument on the same surface, but by using very tiny, short overlapping horizontal and oblique strokes. Use a series of precise overlapping horizontal and oblique strokes for the distal and facial surface of the posterior teeth, beginning at the distofacial line angle. The extreme third adaptation of the working end is the same as for the standard Gracey, really parallel to the tooth.
Horizontal overlapping strokes are very effective in removing deposits from the distal line angle of posterior teeth and the middle back part of distal surfaces. Additionally, short precise horizontal and oblique strokes work better in narrow distal pockets, preventing damage to the tissue while using a standard working blade. (Figures 4a, 4b, 4c).
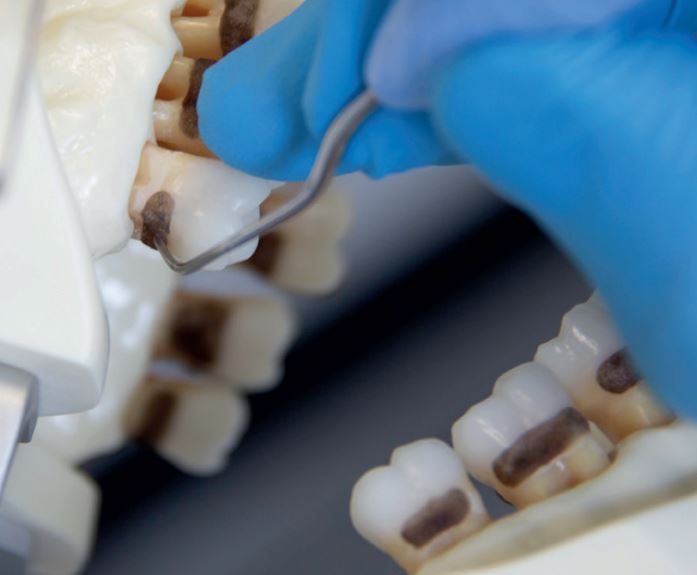
Figure 4a, 4b, 4c Overlapping horizontal and oblique strokes with the Macro Gracey 13/14

It is very important for the combination of working end size and long shank in the Macro Gracey to allow the clinician to achieve appropriate lateral pressure on a distal surface without over-stretching the fingers.
An alternative choice of instrument choice would be a Mini Gracey 13/14 for tiny deposits in narrow pockets, or a Gracey 17/18 as shown in the pictures below (Figures 5a, 5b).
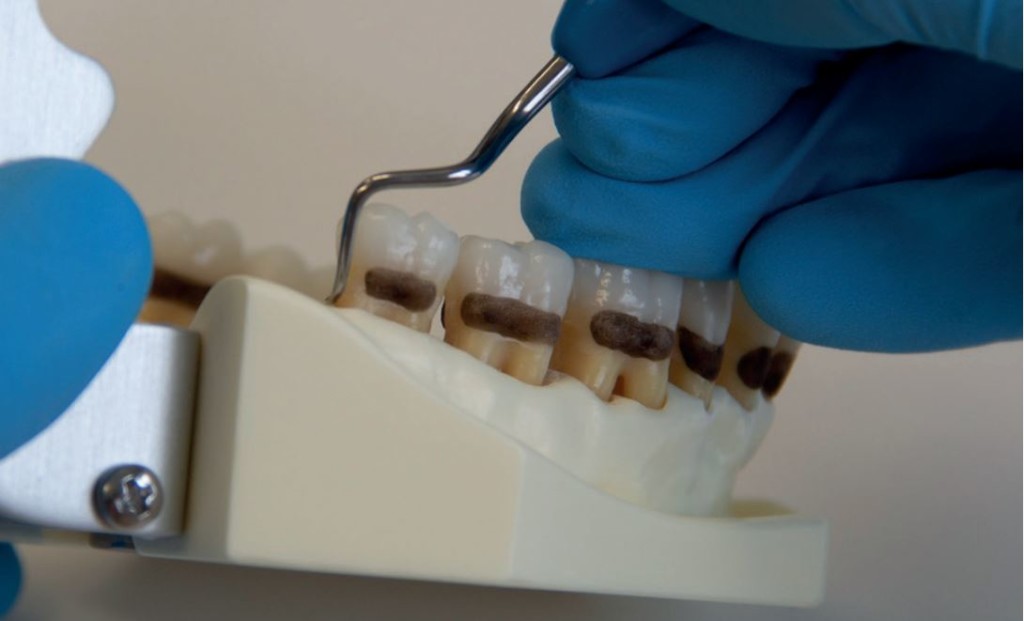
Figure 5a, 5b Scaling with standard Gracey 17/18 247-248ES on wide distal surface of lower-jaw third molar.
The lower shank of the standard Gracey 17/18 is as long as that of the Macro Gracey, but the angulation is perfect for the posterior adaptation. We recommend establishing a ring finger fulcrum on the occlusal surfaces of molar or premolar. Closeness to working area fulcrum is recommended for removing tenacious distal tartar.
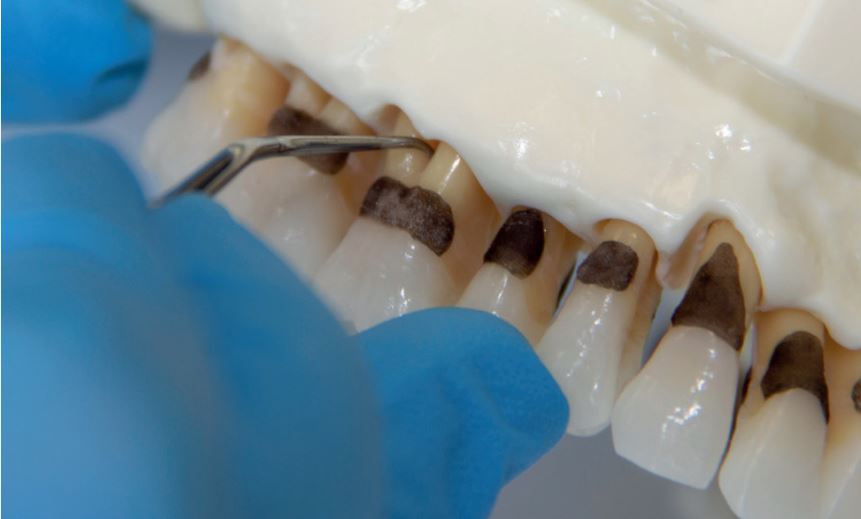
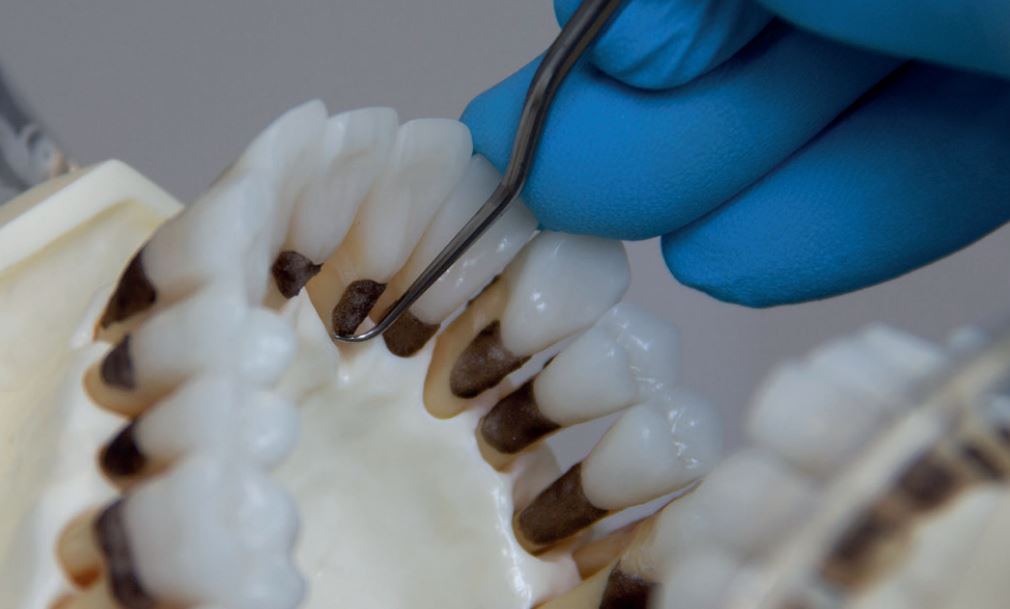
Usually, it is advisable to use Gracey 7/8 for the buccal and palatal surfaces. However, Gracey 13/14 is much easier to adapt to curved palatal and lingual surfaces scaling palatal anatomical depressions. You can start doing a series of vertical strokes using a Macro Gracey 13/14, but the palatal root has a root depression that is difficult to clean using only vertical strokes. That is why you need to scale palatal surfaces using a Macro Gracey 13/14 with tiny horizontal and oblique strokes, forwarding the tip-up and moving the instrument in a mesial direction. If the 13/14 is still difficult to adapt, you can also use the Mini Gracey 11/12 for the same purpose and with the same technique, but it is more suitable for buccal surfaces. Note that it is the lower cutting edge that is adopted to the tooth surface (Figures 6a, 6b).
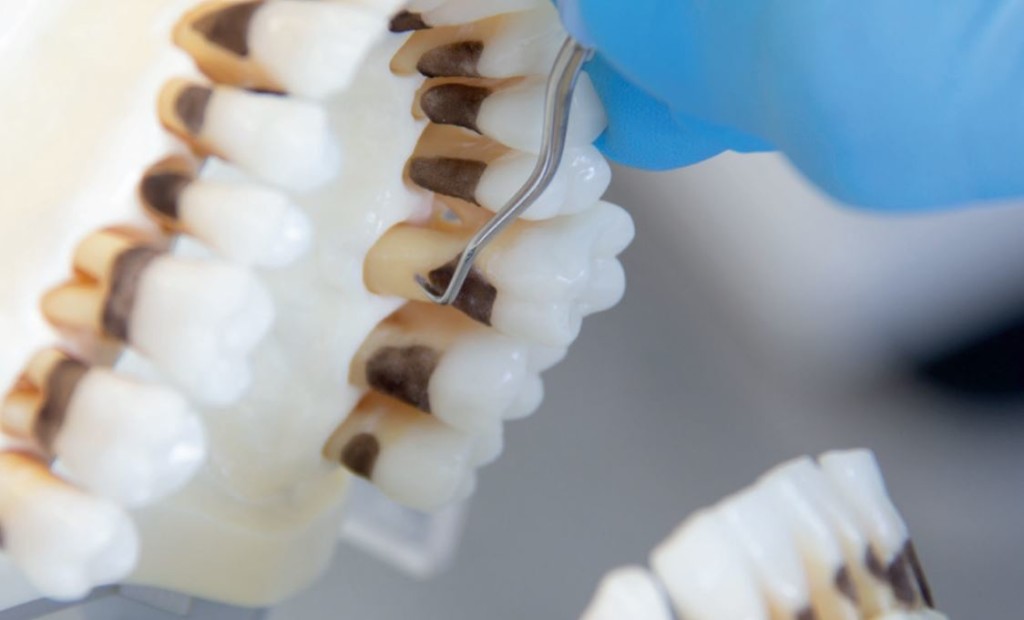
The same movement can be used supra- and sub-gingivally on a lower jaw’s buccal surfaces. Selecting a longer shank with a wider and longer blade, such as Macro Gracey, may generally be more efficient in deep and wide periodontal pockets (Figures 7a, 7b).
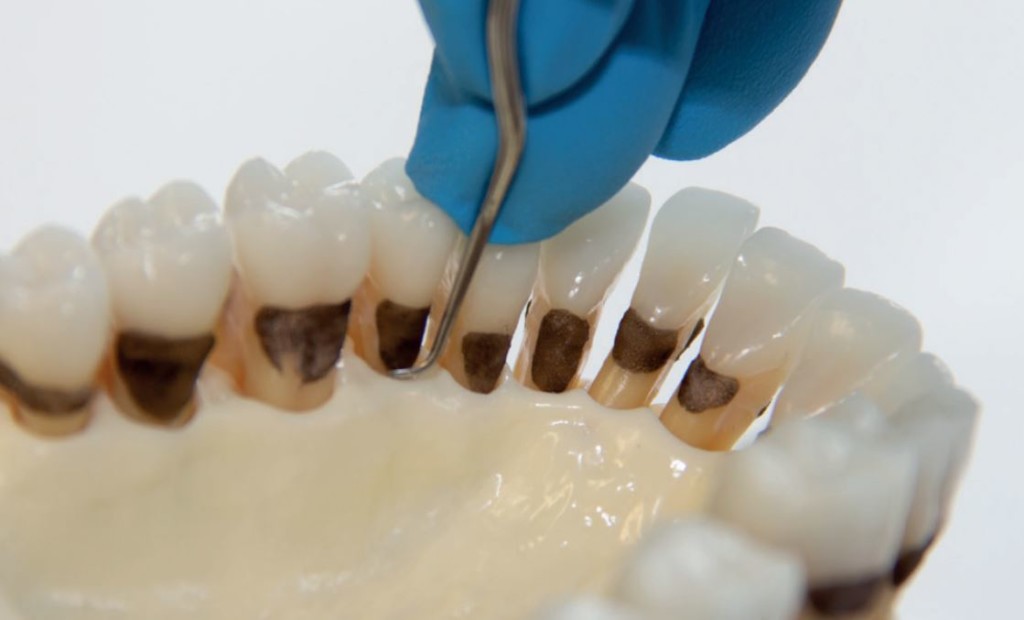
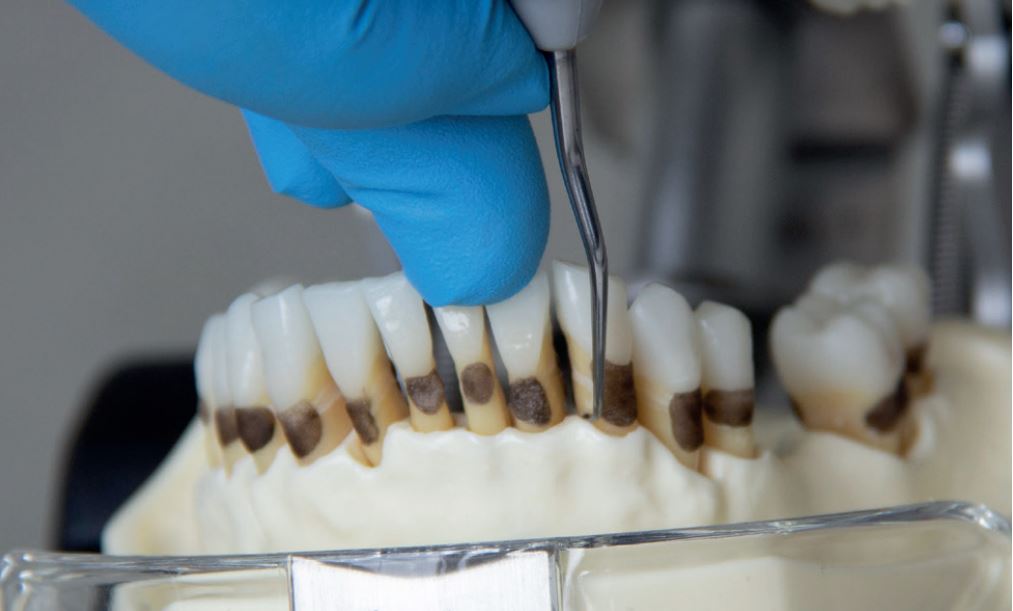
You must re-establish your finger position before continuing the mesial sides with some vertical strokes, scaling all
posterior teeth in upper and lower jaw with the Mini Gracey 11-12. (Figure 8a, 8b)
It is appropriate to use some tiny horizontal strokes with a tip-up or tip-down technical scaling concavity on the mesials of posterior teeth. You must use a working end opposite from the one you used to make vertical strokes on the mesial surface (Figure 9).
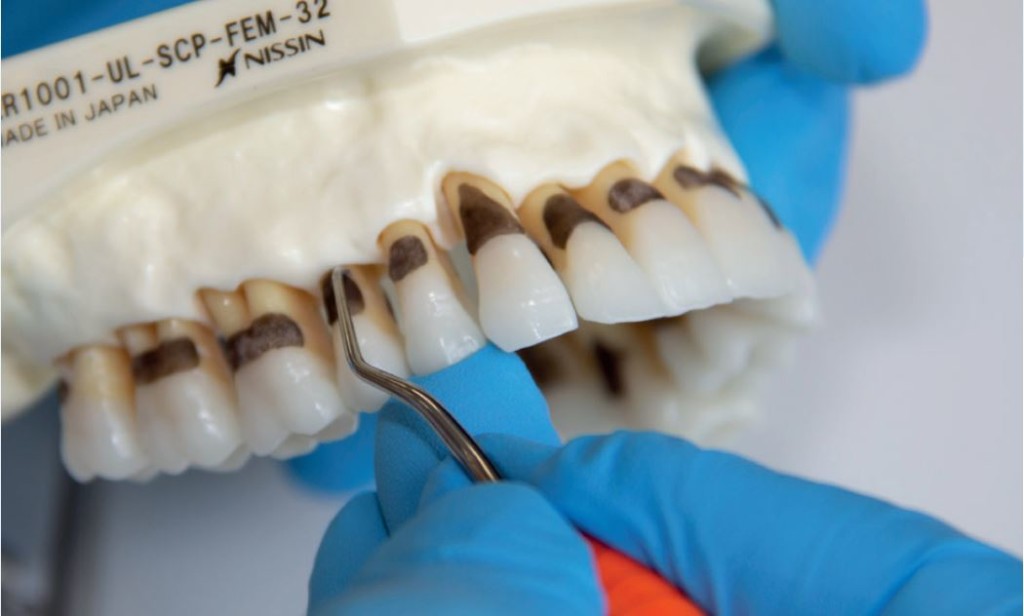
Figure 8a Scaling posterior mesial surfaces with Mini Gracey 11/12 (vertical strokes), upper jaw

Figure 8b Scaling posterior mesial surfaces with Mini Gracey 11/12 (vertical strokes), upper jaw
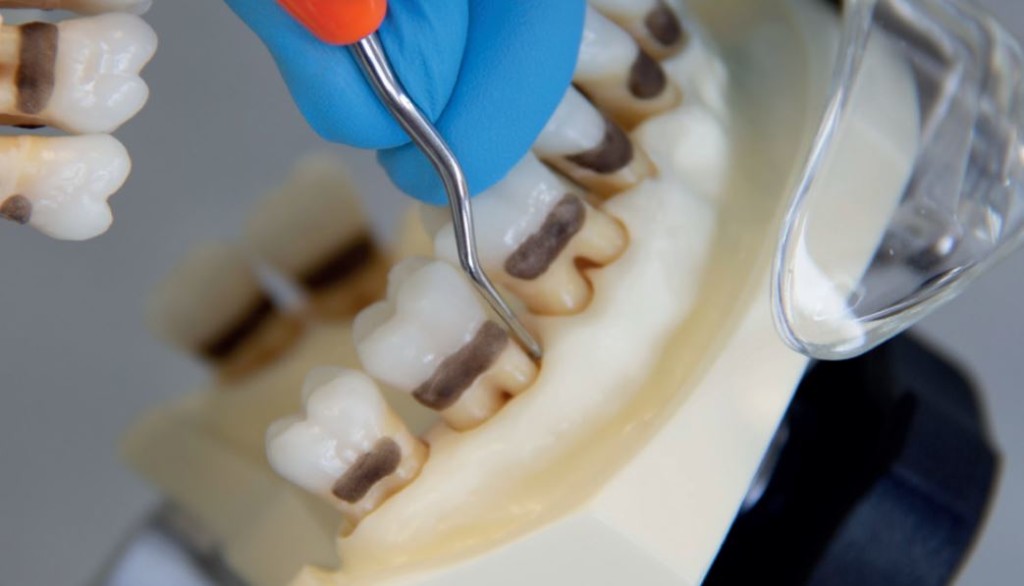
Figure 9 Scaling posterior mesial surfaces with Mini Gracey 11/12 (vertical strokes) lower jaw
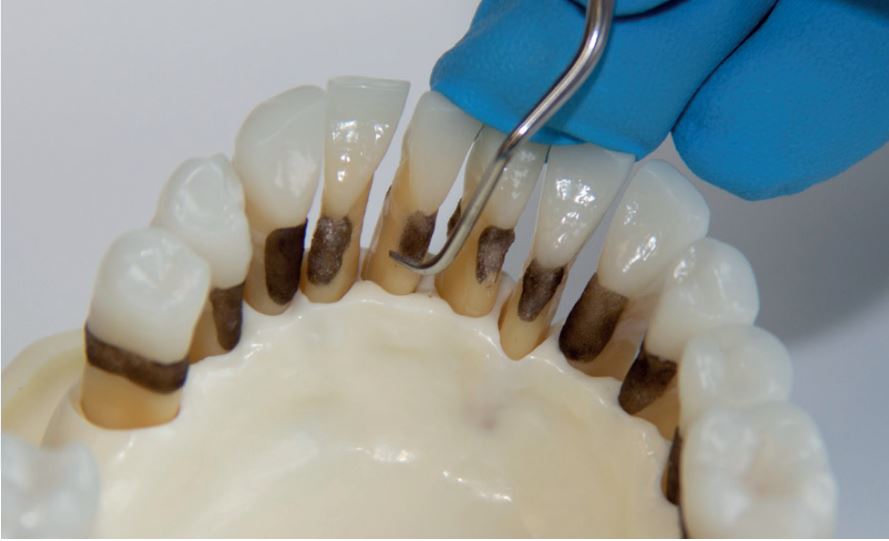
Mini blades are easy to adapt scaling a furcation. You can take all the mesial sides of distal, mesial and palatal roots with the Mini Gracey 11/12 as shown here. You must approach the mesial furcation on upper molars from a buccal position. The rather straight distal surfaces of mesial roots can be treated by the Mini Gracey 1/2. The tooth anatomy is a determining factor in the choice of instrument for the ceiling or bottom of the furcation. See Figures 10c and 10d for use of Mini Gracey 11/12 on furcation, applying very light tiny strokes considering the short distance to the pulp. Additionally, a diamond file may be chosen for extra polishing.
The Gracey 13/14 or Gracey 11/12 can be used on front teeth that are inclined backward (retroclinated), when the angulation of Gracey 1/2 is challenging. It is still preferable to use Mini Graceys in narrow pockets and Macro Graceys for the wider pockets.
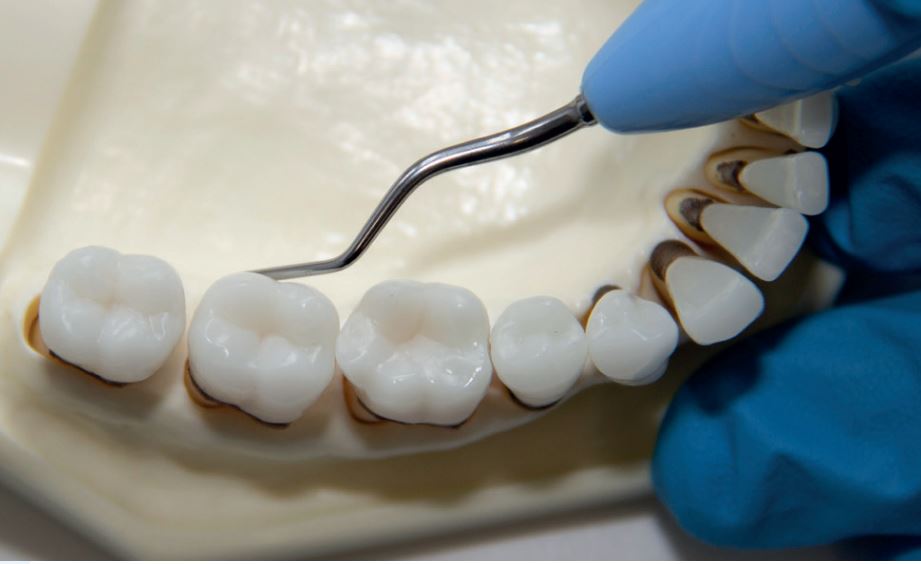
It is a common scaling mistake for scaling strokes with Mini Graceys not to extend past the midline of the proximal surfaces. It is therefore advisable to finish instrumentation by doing some vertical proximal detecting evaluating strokes on proximal root surfaces and some scaling strokes under the contact points with a sickle scaler. A sickle is very good for removing tenacious tartar because of a strong working end and pointed tip, which provides good access to proximal surfaces. A sickle is not however recommended for use on root surfaces, but it is excellent for finishing detective strokes and removing small pearls of tartar on the middle part of distals and mesials (Figures 13a, 13b).
You can complete your periodontal instrumentation by adopting the first third of the Mini Sickle tip against the tooth surface pointing down in the apical direction and doing tiny 1-2 mm, nearly detecting horizontal strokes in very shallow pockets and just below the CEJ (cement-enamel junction). The Mini Sickle is also excellent for finishing evaluation strokes in anterior and posterior proximal spaces, where the working end of the Gracey curette is too wide. Particular attention must be paid to soft root surfaces when using Mini Sickle sub-gingivally or under the CEJ. It is only indicated for applying very light strokes. It is not good to apply too much lateral pressure, especially if your instrument is sharp. For this reason, the author prefers working with the LM Sharp Diamond™ coated sharpen-free Mini Sickle SD. Patients generally appreciate this type of finishing.
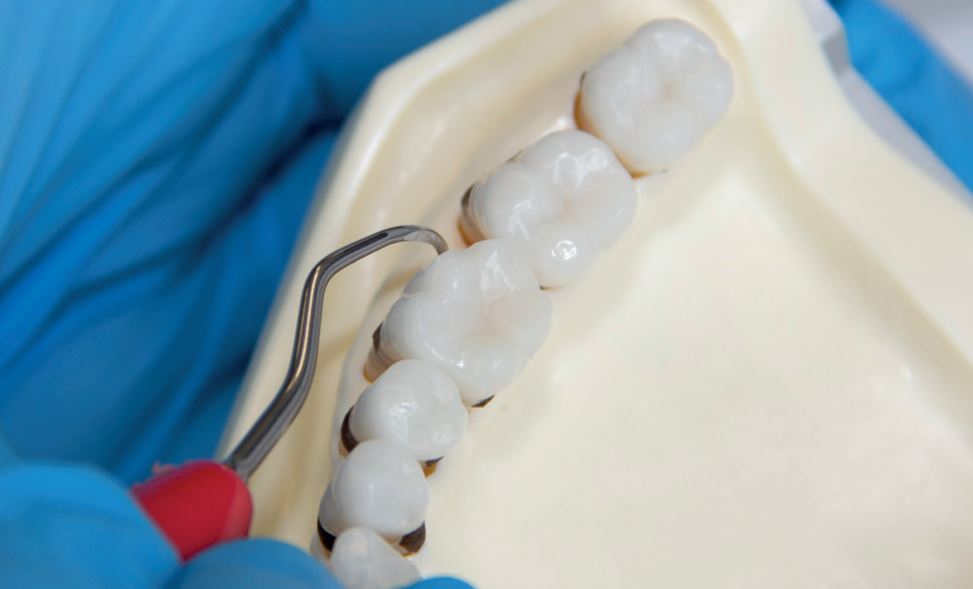
For better spooling effect, and to remove the tiniest deposits at the bottom of a pocket, a slim periodontal ultrasonic tip can be additionally used following evaluation with an Explorer 11-12 or Periodontal WHO probe.
Clinician
Tatiana Brandt
Text and clinical pictures by RDH Tatiana Brandt, clinical lecturer at School of Oral Health Care, University of Copenhagen
About Me:
- Tatiana Brandt, RDH Med (Master Degree in Health Education and Health Promotion)
- I have been practicing clinical dental hygiene for 17 years, and worked for the Department of Odontology and Periodontology at the Copenhagen School of Dentistry.
- Board member of Danish Society of Periodontology.
- For the last 10 years, I have been clinical lecturer at the School of Oral Health Care, Faculty of Health and Medical Science, University of Copenhagen.
- Speaker and course provider for LM-Dental™ and Plandent.
- My main interest is advanced periodontal instrumentation, ergonomics and prevention of MSD in hands and wrists.