
Practical application of a large direct dental filling
Treatment case by Cat Edney
Video
Above you find the treatment case presented on this page as full step-by-step demonstrational video.
Treatment case
The patient attended with a large carious lesion that was buccally cavitated and extended to the occlusal and mesial surfaces of the tooth. It was decided to restore with composite resin, overlaying the mesio buccal cusp. The attached video demonstrates the steps taken in this case, replicated on a typodont model in order to show an alternative use of the LM-Arte™ Solo Anterior and the application of the LM-Arte™ Posterior Misura and LM-Arte™ Solo Posterior. The LM-Arte™ Solo Anterior is rarely used for posterior teeth however in this case there is the added complication that the rubber dam clamp makes the use of a circumferential matrix difficult. The use of the LM-Arte™ Solo Anterior helps to rebuild the buccal wall of the lower left seven tooth due to its anatomical curvature.
Once the rubber dam was placed ensuring moisture control, the tooth was prepared, ensuring a clear peripheral seal zone of 1.5-2mm. The tooth was etched, bonded and resin coated. A fibre composite was placed in deep areas and the tooth was ready to be restored.
Composite was placed on the buccal surface and packed into place using the plugger end of the LM-Arte™ Solo Posterior. The LM-Arte™ Solo Anterior was used to shape and define the buccal wall: creating an anatomical emergence profile while simultaneously rebuilding the necessary structure in order to use a sectional matrix to assist in building the mesial portion of the restoration.
The curved emergence profile was further defined with secondary anatomy in the form of a buccal fissure indicating the space between the mesial and distal cusps.
A sectional matrix and clip were placed, ensuring that the sectional matrix protruded over the ideal mesial marginal ridge height. This allowed for the use of the LM-Arte™ Posterior Misura instrument, which was placed over the matrix during the process of building the mesial wall.
Composite was placed and packed into the mesial wall using the posterior solo and then the height was determined with the LM-Arte™ Posterior Misura. The sharp end of the LM-Arte™ Solo Posterior. was then used to refine the lingual and buccal edges of the mesial marginal ridge and the composite was cured before the ring and matrix were removed.
The remaining restoration was achieved In a cusp by cusp composite placement protocol, focusing on maintaining morphological contour of cusps and secondary fissure anatomy. The LM-Arte™ Solo Posterior has a pointed end that is helpful when removing excess and placing secondary anatomy to mimic the natural tooth tissue. The LM-Arte™ Solo Anterior was used again to define the curvature of the mesial cusp tip and the final restoration was cured under glycerine.
Using these LM-Dental™ instruments helps gain predictability in restorations like such as the above example. This is in part due to the superior grip of the handles, allowing for better clinician comfort and ergonomics and also the innovative design of each instrument, with a focus on clinically representative outcomes for patients.
Choice of instruments
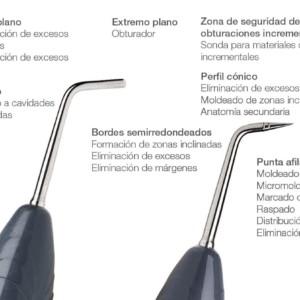
For these type of cases, I recommend to use the following set of LM-Dental™ instruments.
- LM-Arte™ Solo Anterior

- LM-Arte™ Solo Posterior

- LM-Arte™ Posterior Misura

Related products

Step-by-Step Explanation of the case
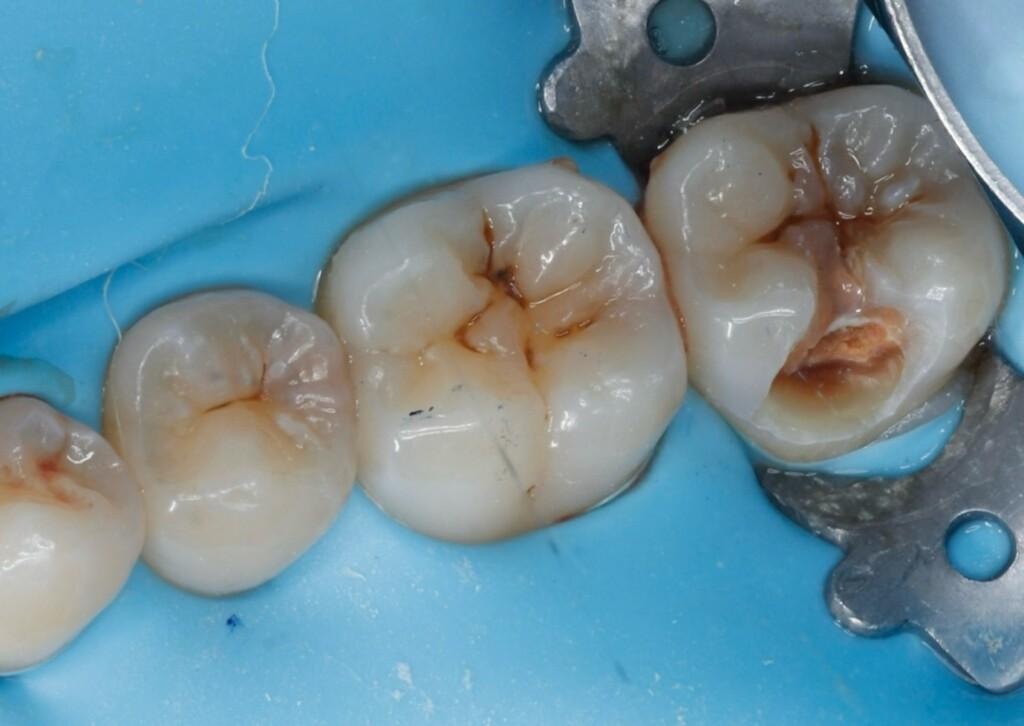
Figure 1. Patient presented to the clinic with a large buccal cavity on the lower left second molar with caries extending to the occlusal and mesial surfaces.
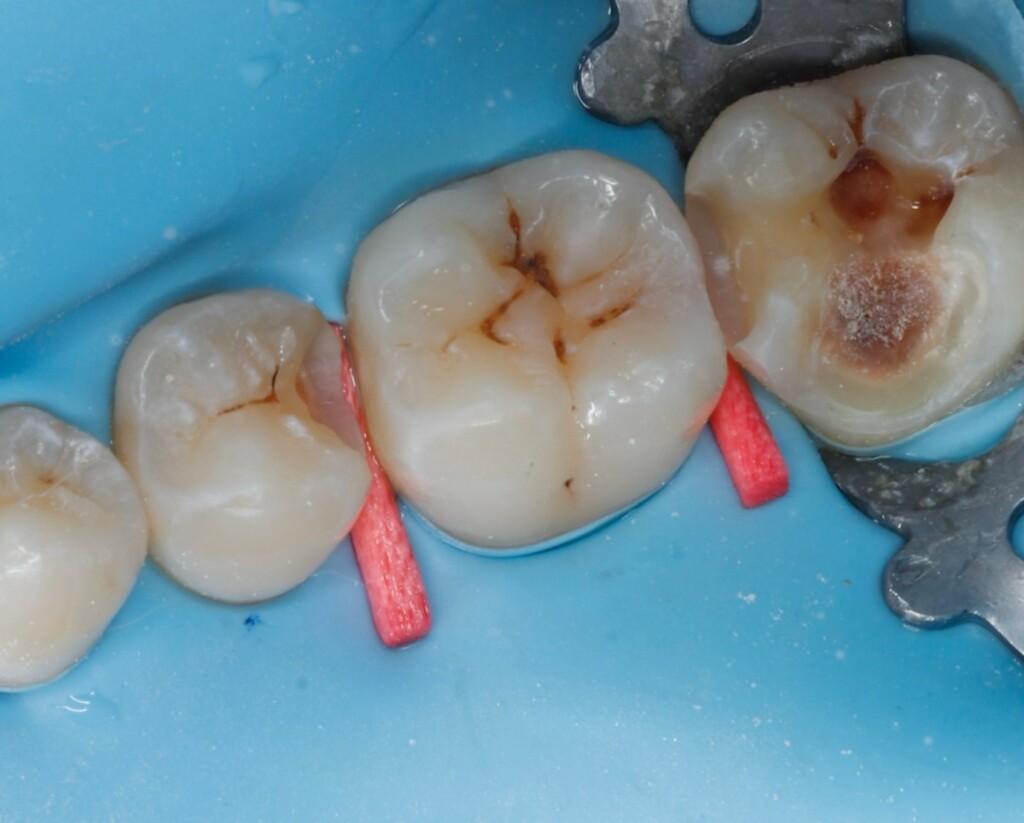
Figure 2. Tooth was prepared to ensure a clear PSZ and sandblasted , it was decided to overlay the mesio-buccal cusp as it was thin.
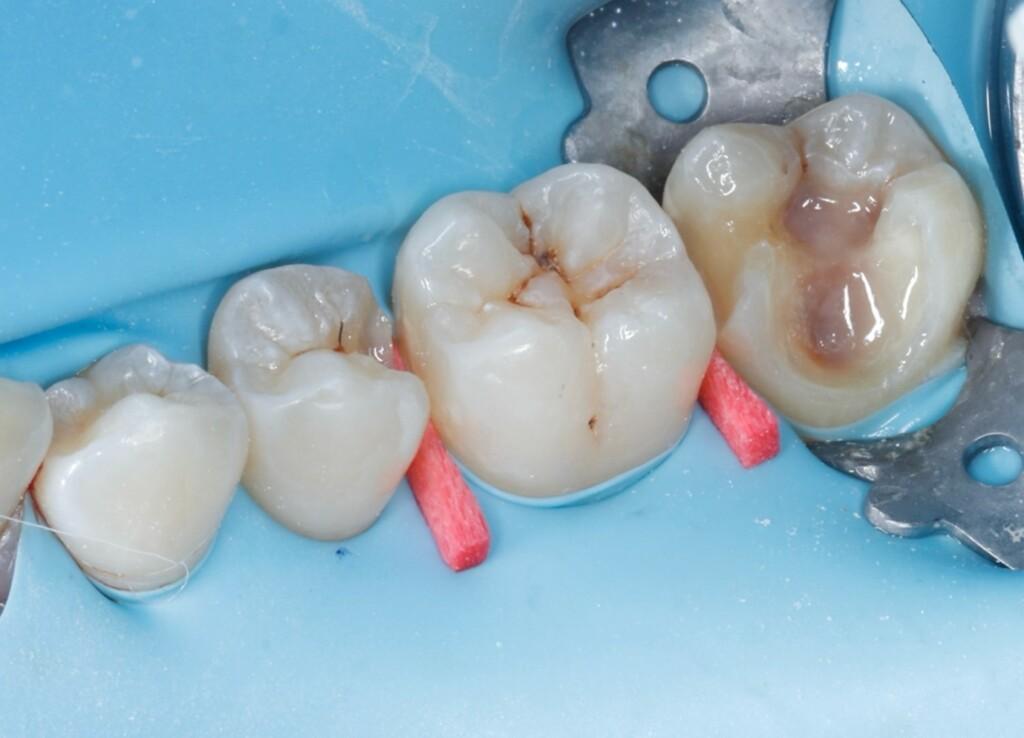
Figure 3. Tooth was resin coated with flowable composite and fibre composite placed on deep areas.
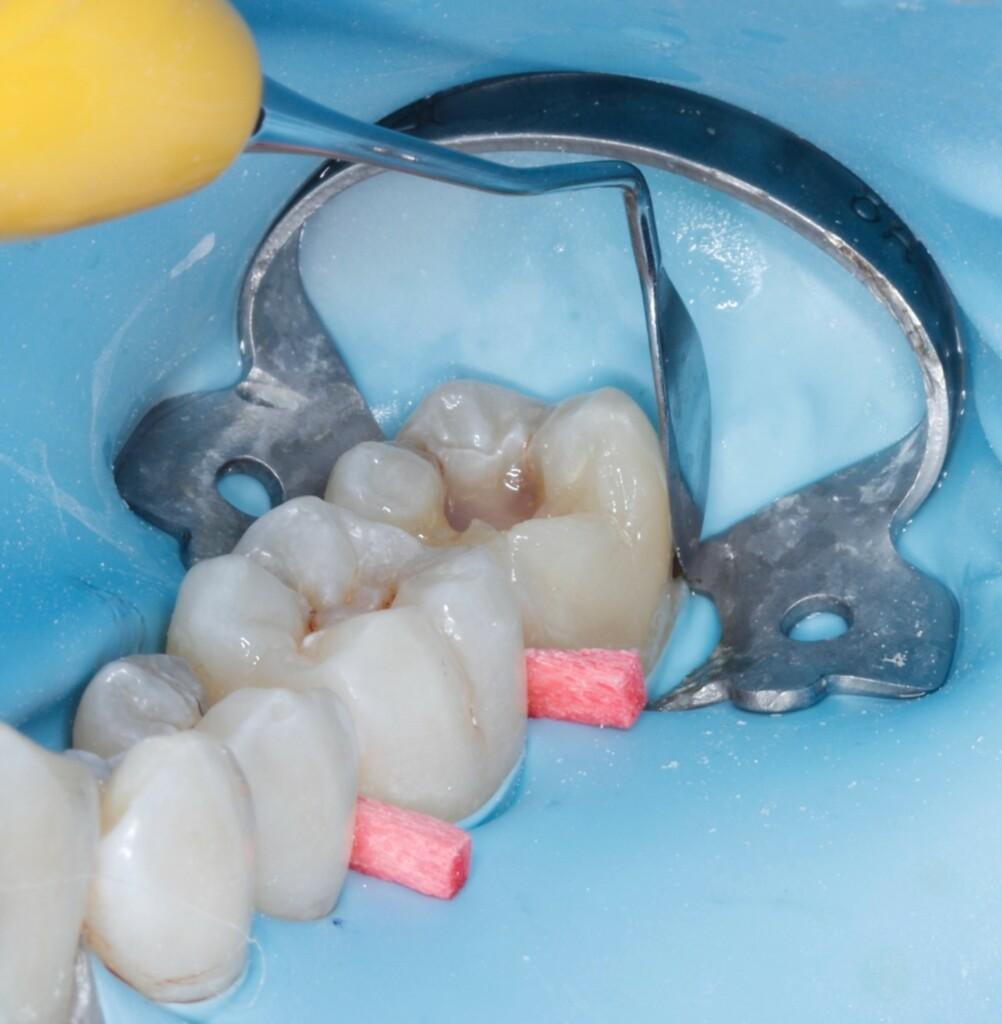
Figure 4. As the tooth was the last in arch it was supporting the rubber dam clamp and so placing a circumferential matrix was not an option, the buccal wall was rebuilt using composite and the anterior solo. The curved surface of the anterior solo provides a buccal contour the mimics the natural dentition.
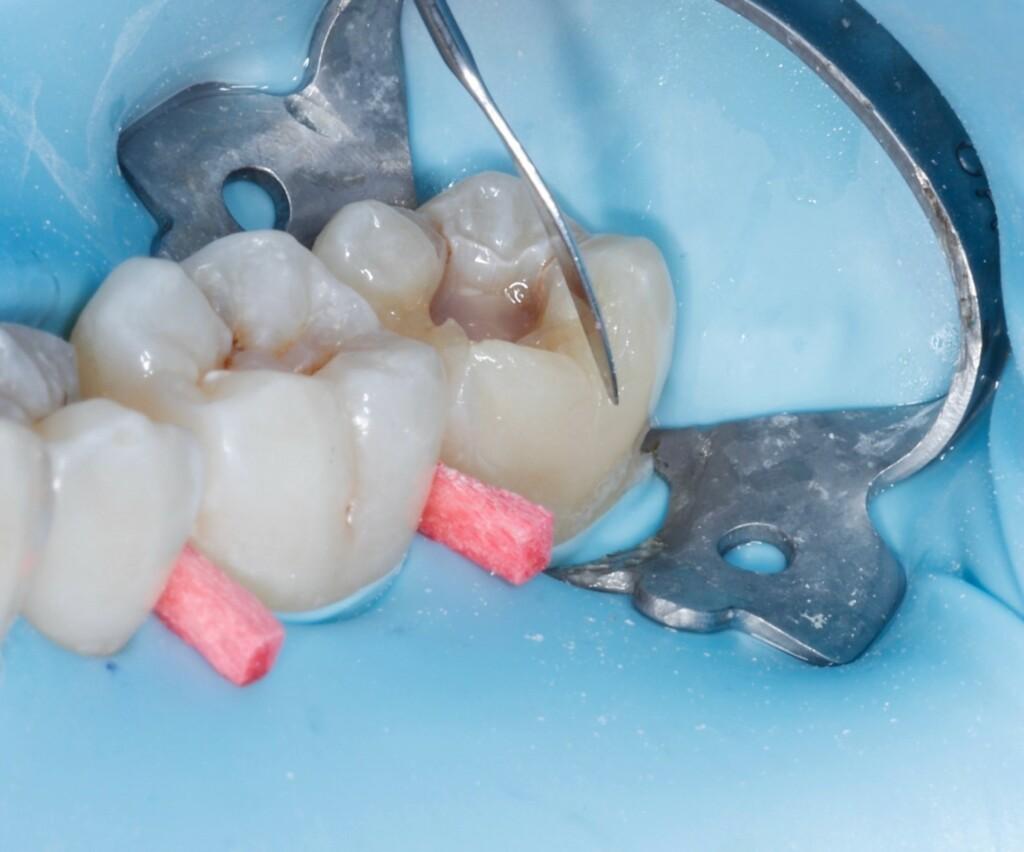
Figure 5. Aesthetic fissure details are achieved using the fine edge of the LM-Arte™ Anterior Solo.
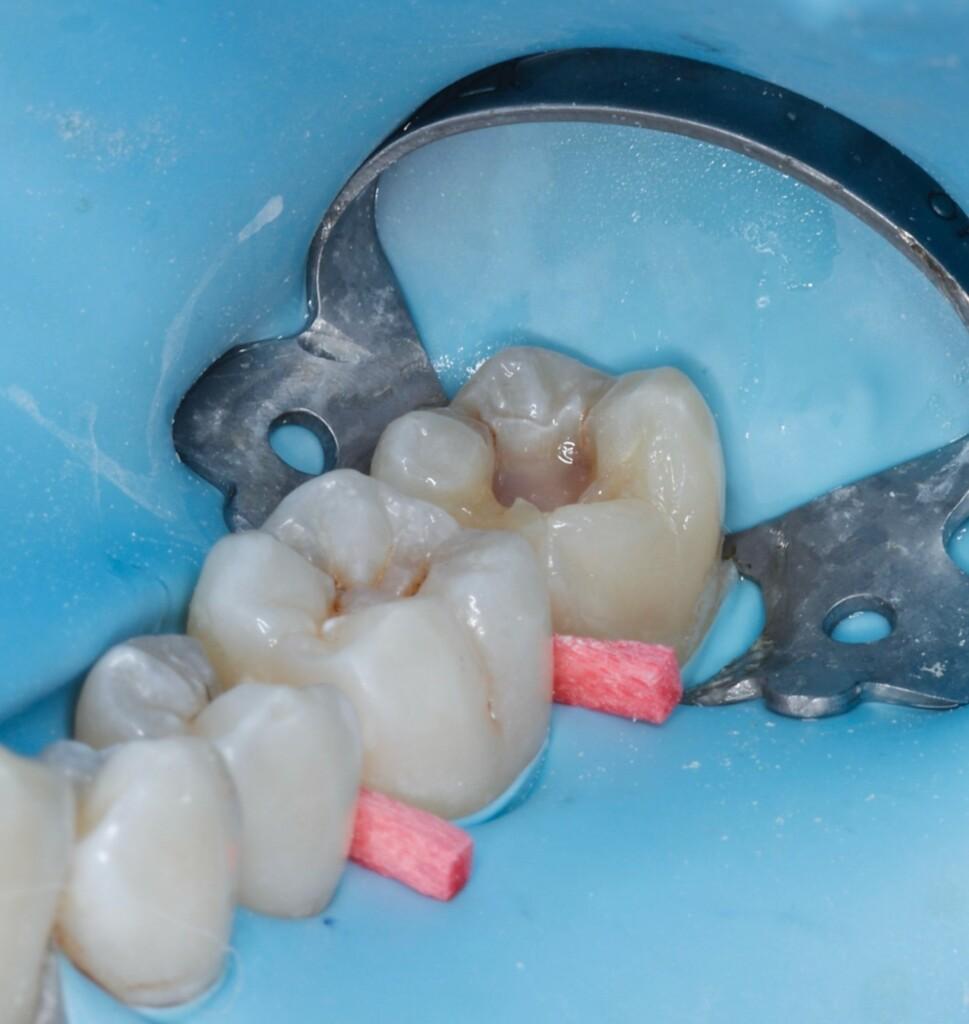
Figure 6. Final buccal wall form.
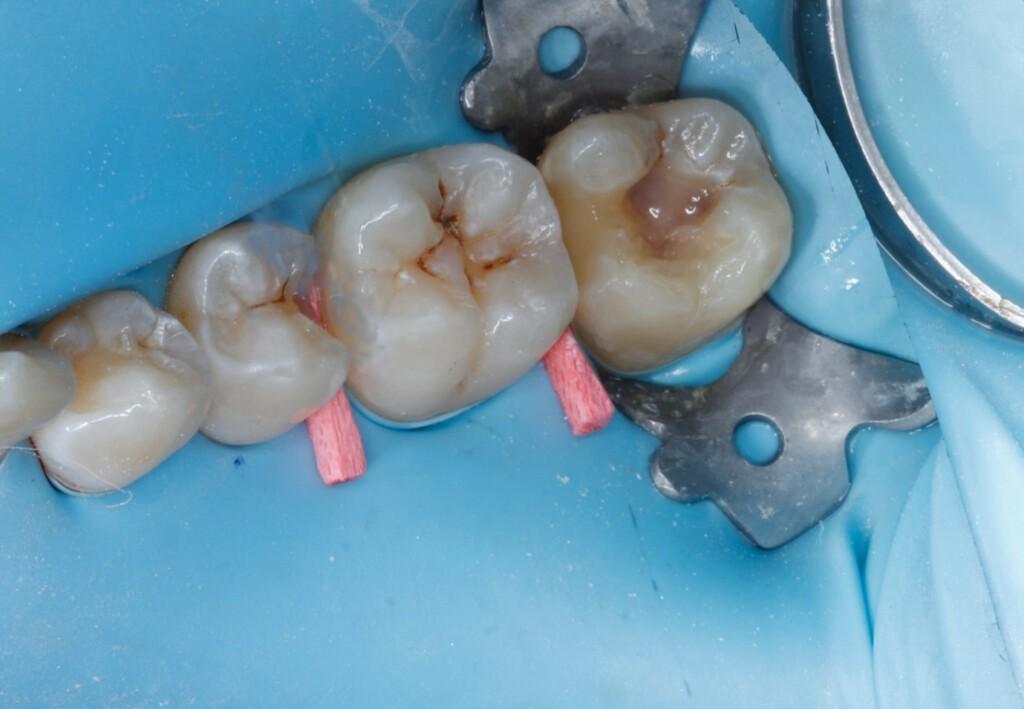
Figure 7. Occlusal view of buccal wall form.
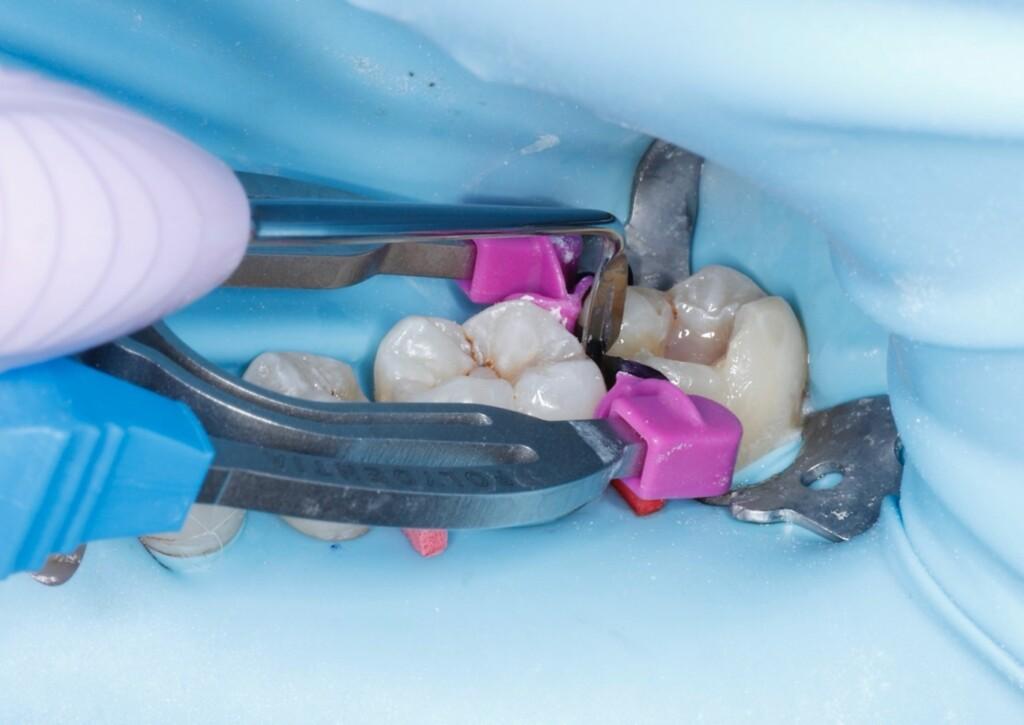
Figure 8. Sectional matrix and ring placed and LM-Arte™ Posterior Misura used to determine mesial wall height.
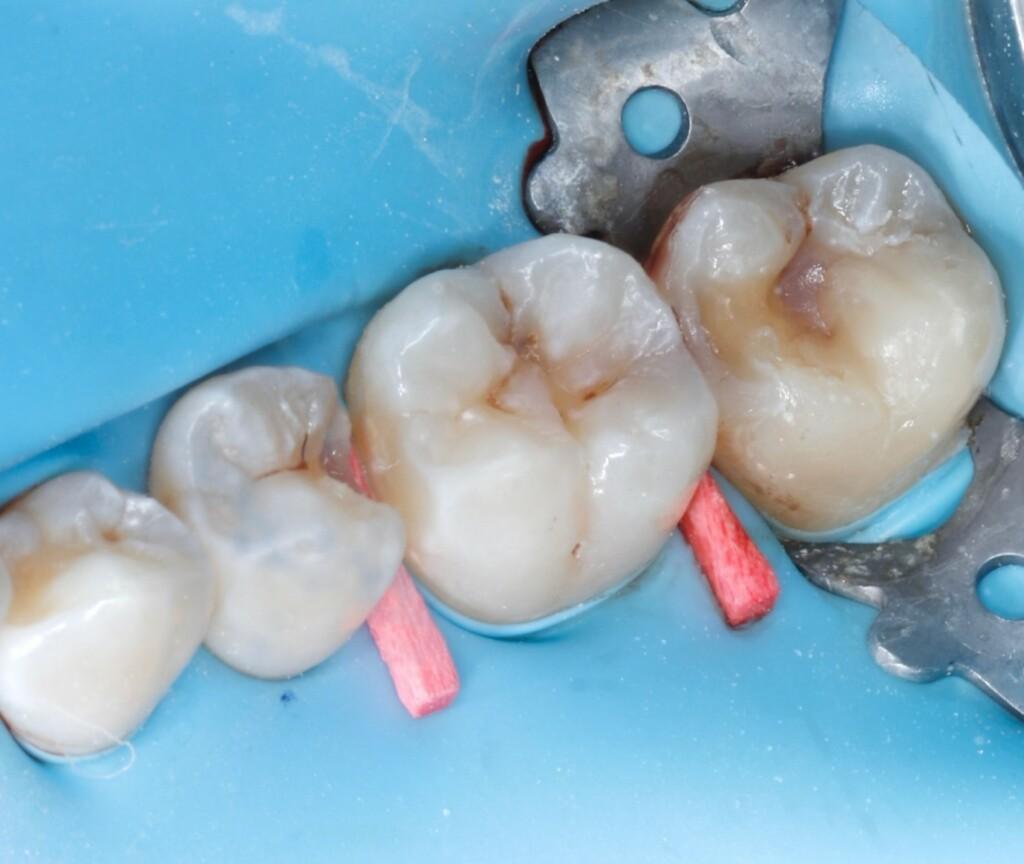
Figure 9 Final mesial wall height created and cusp by cusp placement of composite commences.

Figure 10. LM-Arte™ Fissura used to for incremental placement of cusps.
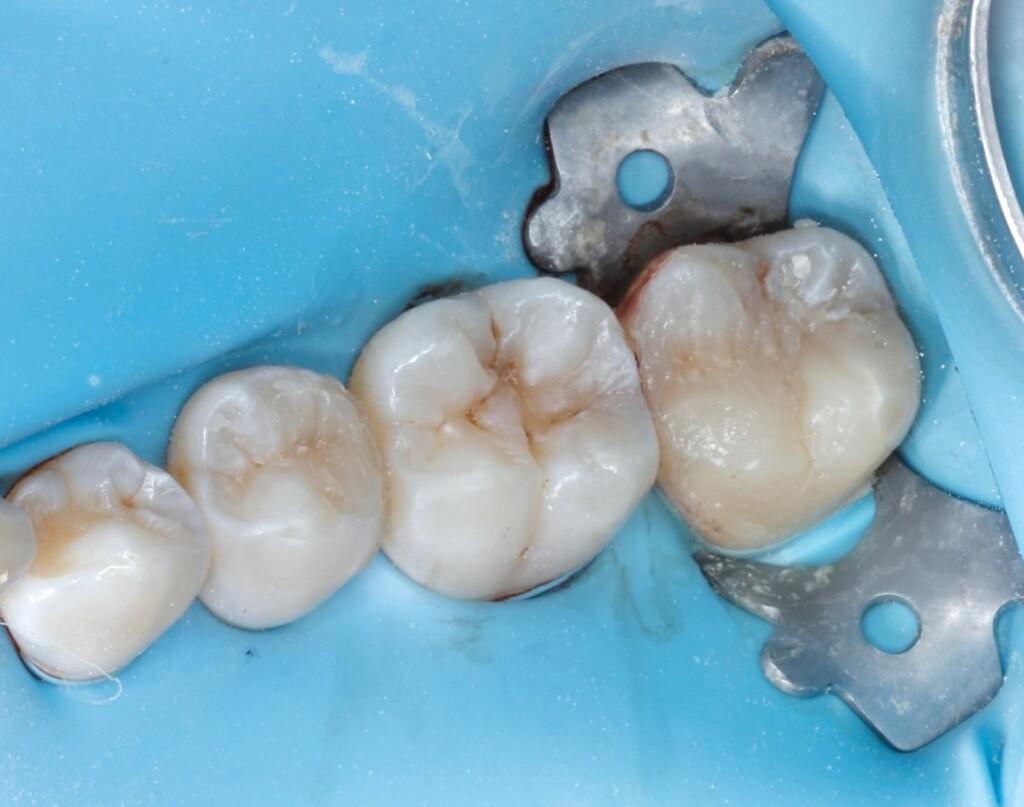
Figure 11. Final restoration.
Clinician

Cat Edney
Text, video and clinical pictures by Cat Edney, Dip DH Dip DT pgDip Dist
About:
Multi award winning Dental Therapist Cat Edney has over fifteen years’ experience working in specialist and private practice in the UK. In this time she has developed a passion for multidisciplinary team working in the Dental Setting – with a focus on maximizing the use of the full dental team to ensure profitability alongside patient care and engagement. Cat lectures internationally as a clinical educator and speaker and has developed hands on dental courses under her training brand ‘The Modern Therapist’ which aims to educate the dental profession about the role and integration of Dental Therapy, alongside focusing on providing gold standard hands on training and ongoing support to dental teams. Cat is on the faculty of the largest dental academy in the UK – The Smile Dental Academy, lectures for top dental manufactures such as LM, NSK, Oral B and Align Technology and also pens a regular column for Dentistry.co.uk. She is now an awards Judge for the Private Dentistry awards and was also named in the UK’s Dentistry’s Top 50 most influential dental professionals.